The Lluc Uceda project continues to advance and we get the latest news about his 3D bicycle project Lucky Lake. The industrial design student continues to make great strides with ISB Sport.
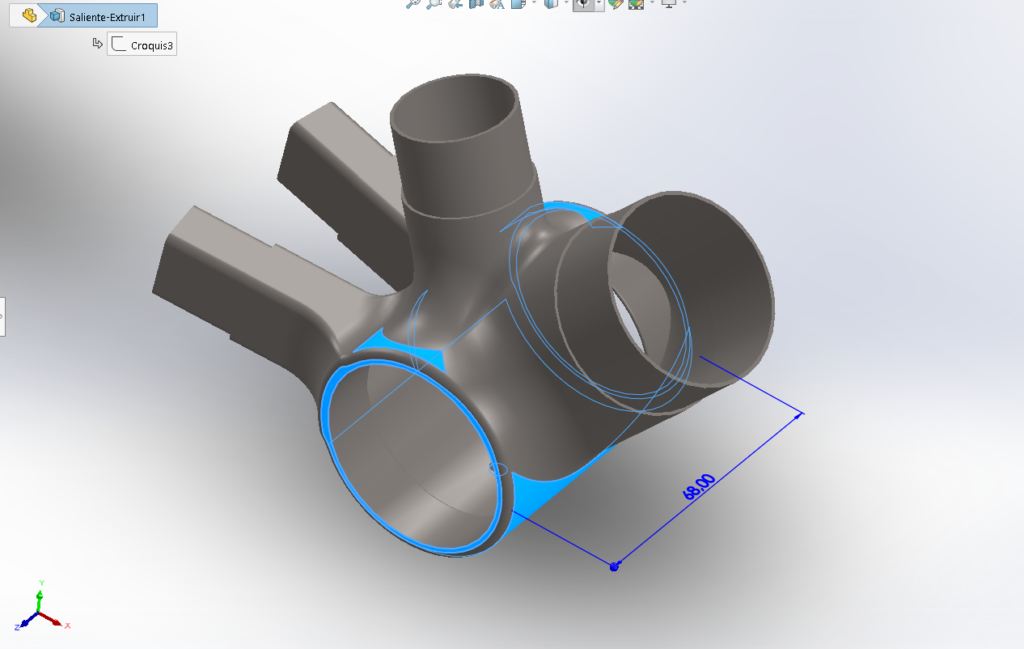
In this image we can see the length of the bottom bracket, which is being designed in SolidWorks while an extrusion is done to create the part. Later the design focuses on the diameter of the bottom bracket, for this frame the chosen option is the PF30 (press fit), which provides a relatively easy adjustment to carry out and with a very high rear crank selection margin.
The change is accommodated with an M10M10 thread. In this case, a length of pin slightly above the usual was chosen. In this way you can mount a cassette with a higher number of teeth without the need to add a Roadlink type extender. Subsequently, a modification of the triangle on the right side is made to make way for the chain, since this jumps slightly when raising and lowering speeds which could cause a small friction that can damage the piece and therefore cause a break.
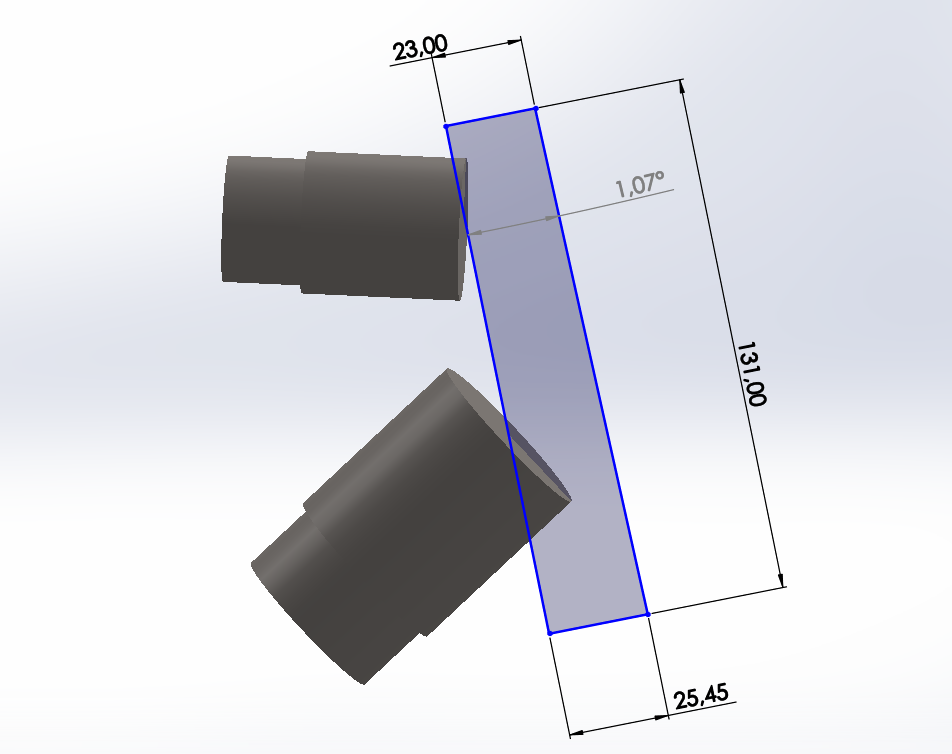
Later we proceed to the design of the steering piece, which as you can see in the following image has a measure of 131mm in length with a conical style with an angle of 1.07 degrees to be able to carry forks from 1 1/8 to 1 1/4 inches.
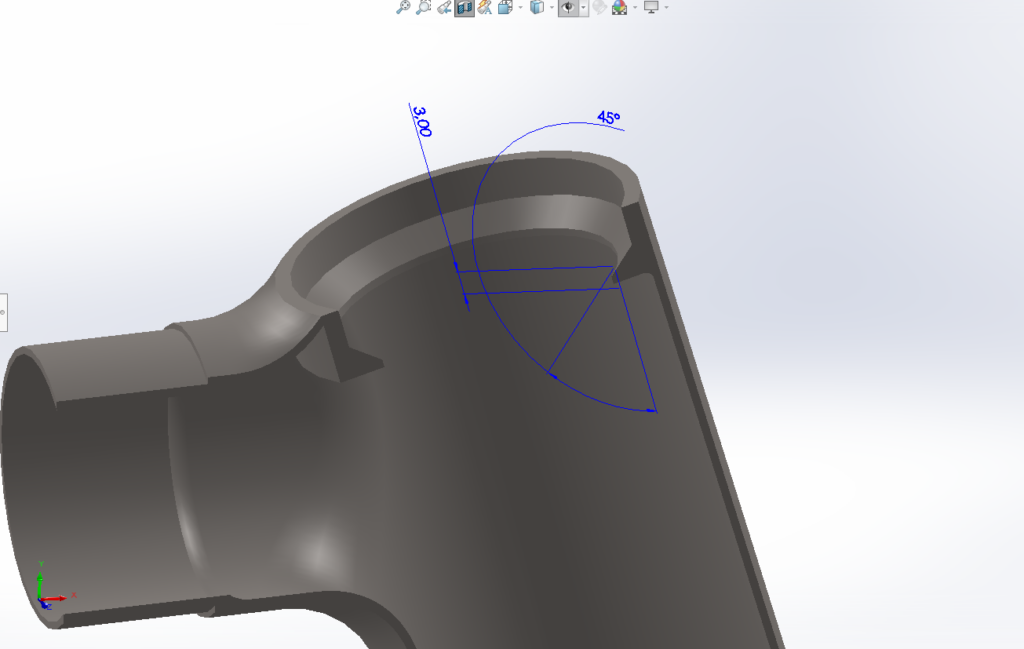
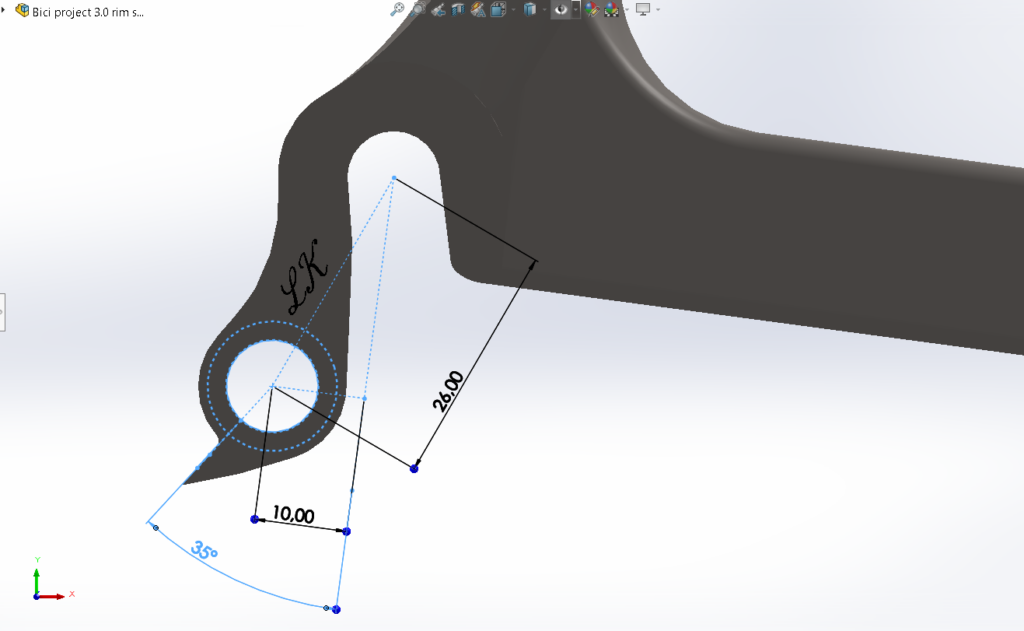
For this frame it has been decided to mount an integrated steering system, which inserts the bearings directly supported on the sockets specially designed for their measurement. In the case of the upper bearing it is a measure of 1 1/8 inches, while the lower one has a measure of 1 1/4 inches so that these adapt perfectly to the type of fork.
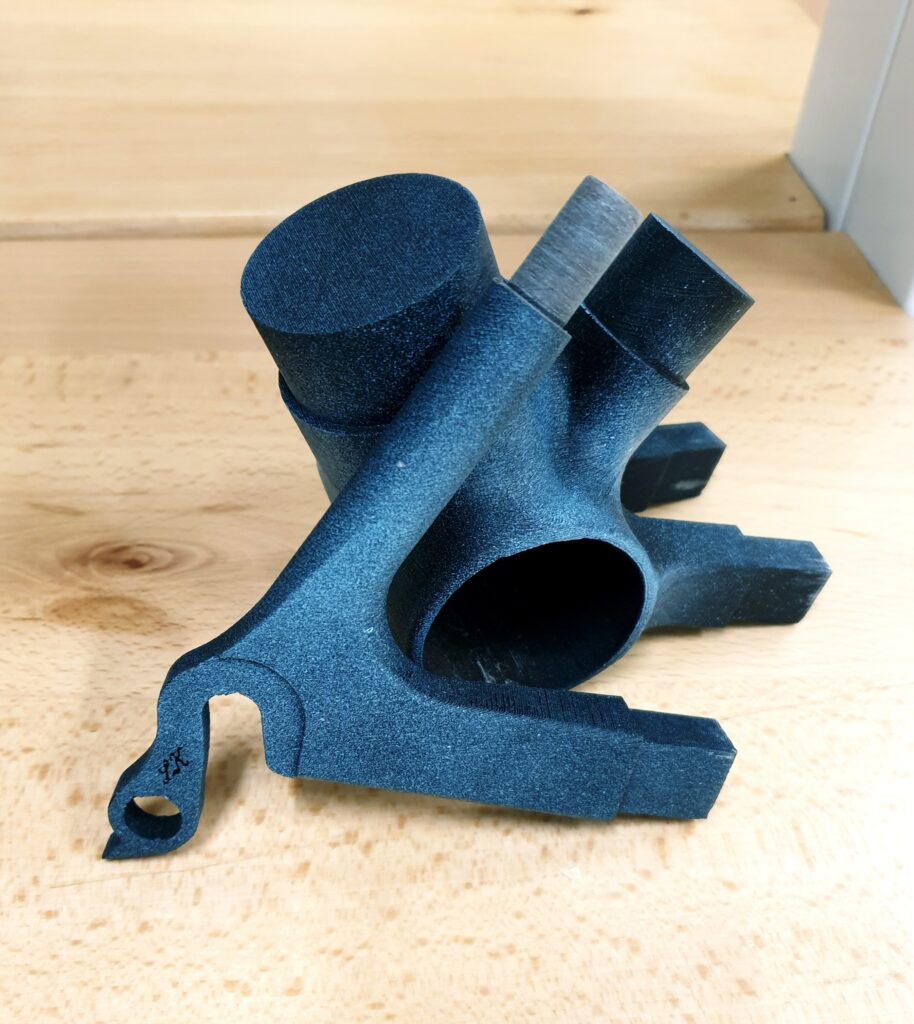
First, the five pieces are printed completely completed with PLA material at 210C with the base at 60C together with a layer height of 0.16mm. Subsequently, the pieces are painted to leave a minor roughness and leave a small layer that serves as a primer for subsequent masilling, sanding, painting and varnishing. It is at this moment where the joints that will join the tubes to fit are sanded by means of a slight pressure in such a way that the hot silicone adapts to the sides of them and ensures a good fixation.
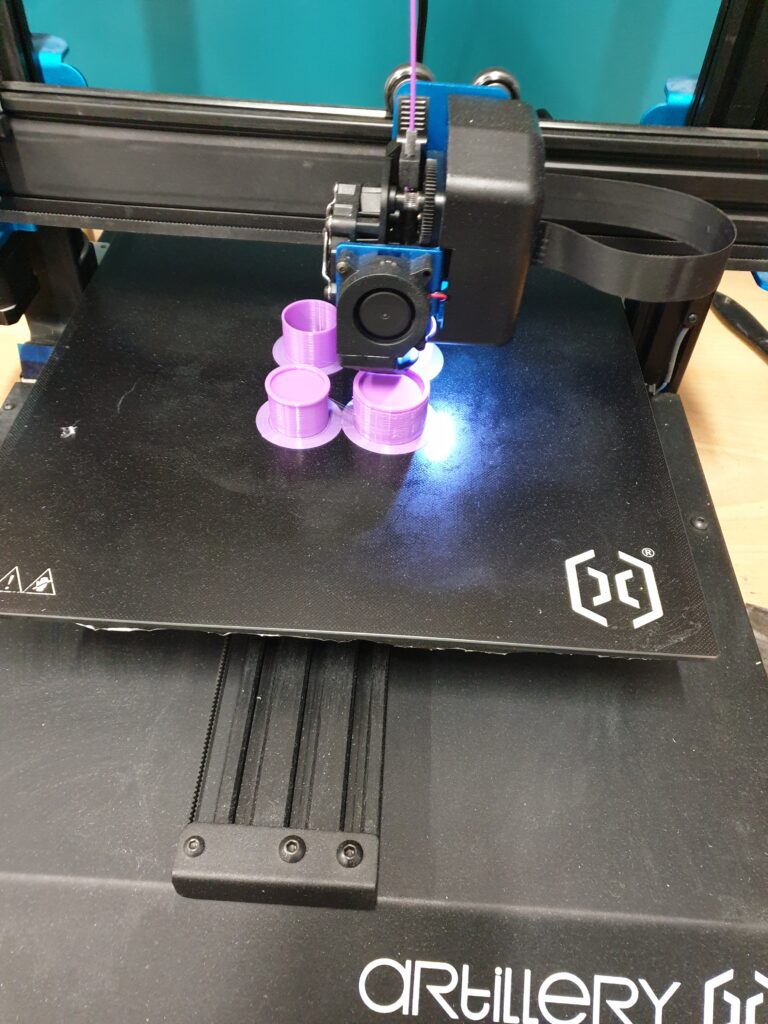
We proceed to the printing of all the tubes that will make the union with the pieces. These being of a considerable length for the size of the printer are divided into 3 parts and are made fittings similar to those of the pieces in this way they can fit together by hot silicone and ensure a good fixation.
Then a layer of acrylic paint is applied together with white glue to caulking so that it can be sanded and thus a uniform finish with practically no printing marks related to the height of the layer and polygonal shapes throughout the pipe. Once the task of caulking and sanding is finished, we proceed to the black spray painting to check the result obtained. It is at this moment that it is used to finish polishing some of the joints and points where there may have been traces of imperfections on the surface of the painting.

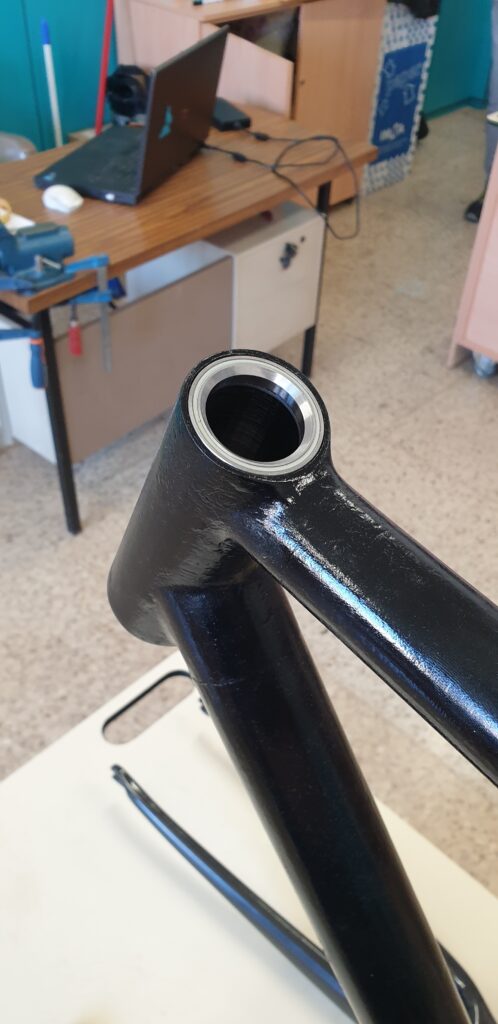
We proceed with the sanding of the supports of the steering bearings to be able to adjust the tolerance as perfectly as possible without them being loose or too tight. They end up adjusting with a slight pressure. At this time checks are made to ensure that the design of the tapered steering 1 1/4 has been successful and therefore the bearings fit perfectly without them leaving the frame or too sunk inside the head pipe.
From ISB Sport we are already looking forward to seeing the final result of this project of the young Lluc, we are very proud to be part of it and to be able to support young people to realize their ideas.